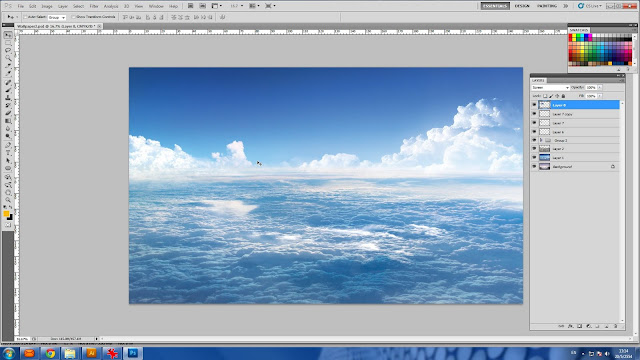
Sky Retouch Tutorial
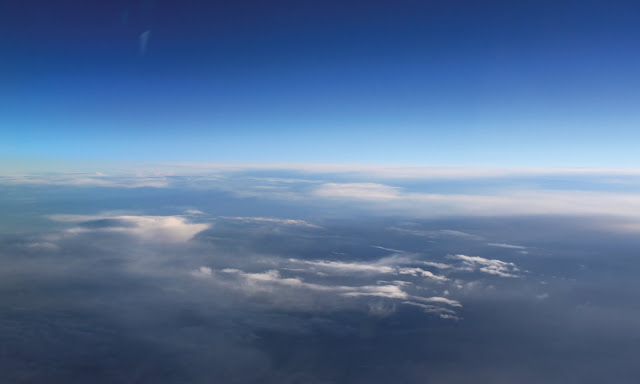
I retouched the image of cloud with sky like when you're looking through out from the window of the cabin aircraft. But I needed to make it looks above realistic too. This job was not so difficult as I used not many sources from Google to retouch. I would like to teach you too.I found one photo of an atmosphere I were looking for. Luckily, it's very high resolution.
![](https://blogger.googleusercontent.com/img/b/R29vZ2xl/AVvXsEirnzpq0PQcm5-Qop5QRfsNFEtknuQdf8eoZgT5EAdxTJNzh2W14vEV80KSMw_bpydLg67NPL4W3bVweJAfWlSC7aqLQaSjelYtGwQ6QCfQDuG3OnHdrnvq8xfNT9glyfk-lOWPHFMWAHk/s640/1.jpg)
Prepare the sky, which I downloaded, in Photoshop.
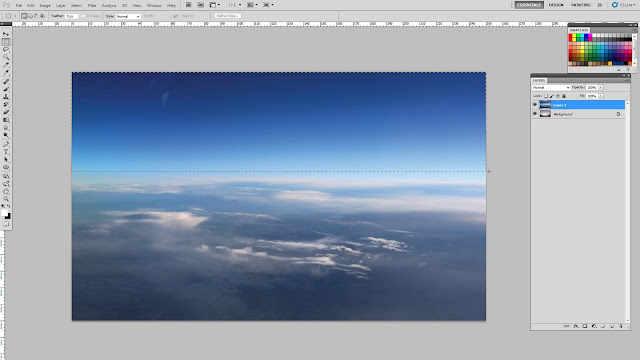
I think the upper part is a bit dark. So I use Rectangular Selection Tool to crop entirely of the upper part.
![](https://blogger.googleusercontent.com/img/b/R29vZ2xl/AVvXsEhtyk8wVoxCqm6pj9ZHlH0yrgvbc-UECW2Q6R5hTscJpVDA4nz0pgIkAXt66weSOUdnLPon6TFg1qjWorlTVJgvTpPmIVgOO19V0gxkhCfYnarGGcPQ0a5GJeQvf5wrgyp4fM8LXtnPhYs/s640/3.jpg)
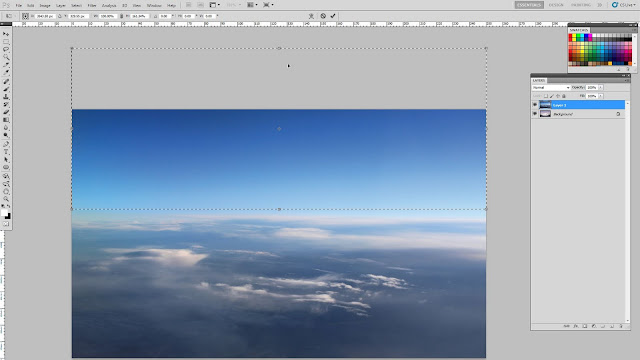
Right click when I am still using the Rectangle tool, then stretch it out off the top of the canvas.
![](https://blogger.googleusercontent.com/img/b/R29vZ2xl/AVvXsEicmURwl6F10GUJxePghQY6TNP8f9BiDZ8tGSwDdOflGWlN1ABX0hPVQcicLBe-JRg4koepNx6cjij8-ghnm3om9tsjBT4T8ISeaoKKvCbOF-Ka5Ogv2QDI8__meNE6aLNBln9Ea_uQwQA/s640/4.jpg)
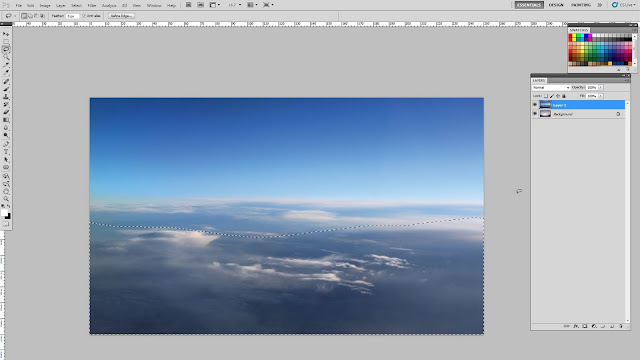
Now this part looks become lighter as I stretched the lighter part to replace the darken part. After that I use selection tool names Lasso to draw and crop on the cloud like this.
![](https://blogger.googleusercontent.com/img/b/R29vZ2xl/AVvXsEilmv7k0ZZGLxosn2p7lUs1gYEvqfqlZJhMawbY0ihOK9WSTnn-03wCToKe3m0JOCcOAPgAPyBlfc4NTLn0ODSwbvUcY7zH1Z8gVZdjYs1I8-r-4ZUp3tTQQtxkLVjzQvbmrsDT0qBkUr4/s640/5.jpg)
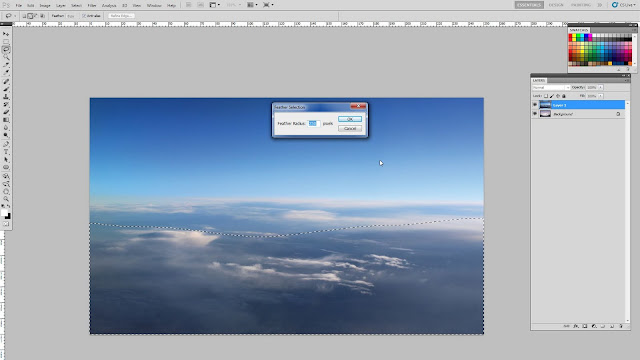
Right click, then select Feather. Because this wallpaper size is about 4 X 2.5 m. I type 250 px in the box to make a lot feather and this value is suitable for this canvas resolution in order to make a lot feather.
![](https://blogger.googleusercontent.com/img/b/R29vZ2xl/AVvXsEjVz3_S6WyzDfoAremIMI94hnVInppywqraFEAmfPtYNbrarUSlnbqHLbzVyzB8iJrJbNSB6usTgYy288wvFOhlQm0yNGKK7xyZ7dcuQjUxo5m89oLORNU9sGif8XjXEbqoTOEt9AR7HOw/s640/6.jpg)
You won't see anything change with your dash line. But if you notice carefully, you may see its dash curve looks more smooth. Actually I need to adjust this cloud part looks more lighte. I use Level command by press Ctrl+L. Move the right arrow more to the left. It will make everything inside a dash line looks more light.
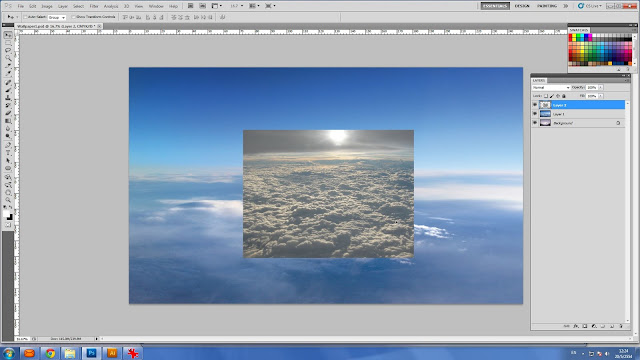
Paste a photo that has different feature of cloud which I have downloaded from Google before.
![](https://blogger.googleusercontent.com/img/b/R29vZ2xl/AVvXsEjHyp614v7fm-UqVlu2M7OYVV_XmxcVmfiMhUtTG0rkzKKcoBJTvLyKRtqEaAoFkGTgeSkQi_VB7NHhBeyH3onD5Pc3Gqv8zqbnSZ9JxEb0Ex1uLYrWI4cj0xZJBc4udM7C1C631USaD0U/s640/8.jpg)
Stretch it to cover entire the cloud area. Then use filter from my layer box, a drop down list at top left. Now you see my second photo of cloud seems embedded smoothly into my background.
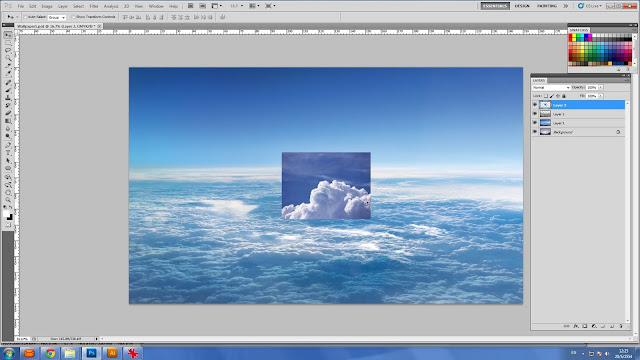
Now I start to make some cloud shape looks like a hill.
![](https://blogger.googleusercontent.com/img/b/R29vZ2xl/AVvXsEi9R9eqUI4TE1a_ez9zBmWYeKLm8V30-YHiGjRbiRQ55_F8SKi9MMeGMWS__vFbbdUTQhQX0jjvu8yeDMlVyZyRVFydPiN-zImel2rS_hrAvyNpV4hMEQZv7mRnFi94KcY0n8xikRboqF4/s640/10.jpg)
The right part at far horizontal is may appropriate location for this cloud. This time I use Screen Filter from my layer box and use Ctrl + L to adjust until the dark part of the cloud looks harmoniously to my sky background.
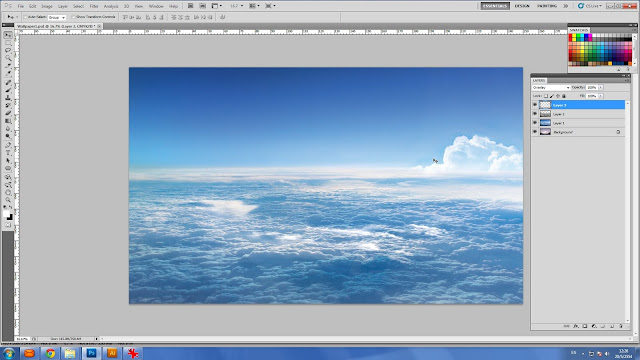
![](https://blogger.googleusercontent.com/img/b/R29vZ2xl/AVvXsEggi_lxiyWggpQaA7DSEtsl0JBcUEDZcOxOjYPWktdd_7eOtJmAoH2Ovosz_ncjEif8n2Mghtqmvo4fZWrwVP_xY_oG5mQvn6Pv3pVJ7wwT9YtcUzq5hZowQ-AiJUghL4mM0w-NsAT0mHg/s640/11.jpg)
I made more various clouds by right click, then scroll to find another cloud brush, which I have in my store.
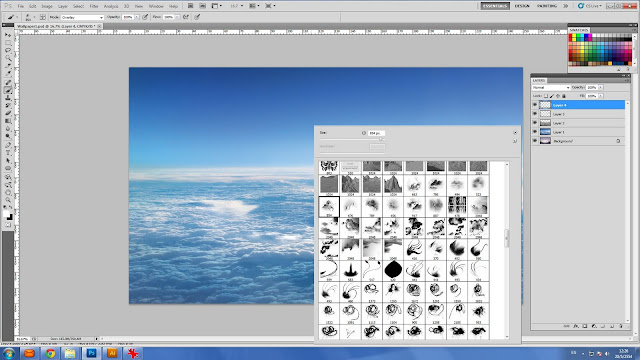
![](https://blogger.googleusercontent.com/img/b/R29vZ2xl/AVvXsEjeapcJEIPedFTXirpMC6INr8vEvdpCqc-DqQpn6YQc-YHgqGItj-6-Fhr27chxGHKvSszsvfI-zyfij8MdzbB1OhPmYM4fag4oMmLmO79jeMJgNXEi-6DAvlppyq_WygZ-B1fOwUkE7sM/s640/12.jpg)
The new cloud looks behind the previous cloud.
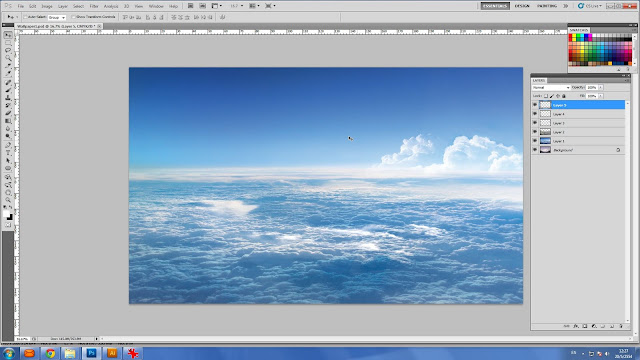
![](https://blogger.googleusercontent.com/img/b/R29vZ2xl/AVvXsEgwXzf5NmCktqlS1k2heNC1Cxg99wjaYeESYSQo3KMAg7VN5RDTjbY2wIpteZd-SM65-ecA7UqPDIvUZtiTLwnOaMJfrl6jP316HskWPOs-rtQW-h1apEz3J90p4uJyfXYNgAkIUX6348o/s640/13.jpg)
To make this cloud higher. I merge between the 1st and 2nd cloud together then duplicate it and move up a little bit.
More cloud at the left part to compensate weight of looking.
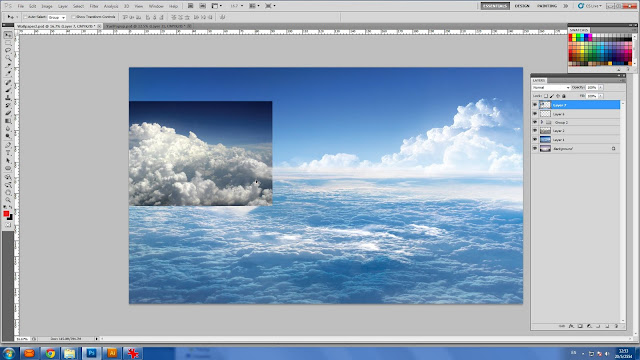
![](https://blogger.googleusercontent.com/img/b/R29vZ2xl/AVvXsEj8soqlWSzG-a5ul9Ki6d-UQK5pdOkpjg5U1ruSad1vQENszpwrJ2pEHDmg27llxq1iD7F71mWh6P4Bd91Sigk207TTZIJjg2PW80mcSSrUDzlZfJFF2kYwCMNvIQURHmq7B3Fjpgte1cs/s640/15.jpg)
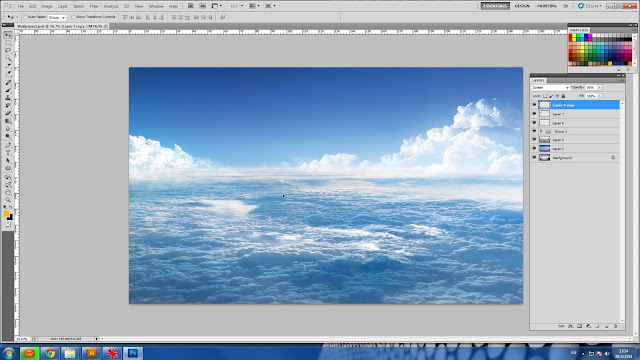
It is the same. Use Screen Filter and retouch to make it looks the same as the right cloud.
![](https://blogger.googleusercontent.com/img/b/R29vZ2xl/AVvXsEiqqFADC3dKCbEK8UDaH1Ye1nm42mYcGzaPsxFjUb2JvPCvZehIhmqrnJj1aCU9rOlGH2WalUtnYXRpJsI9ARv9JFu5Fjq-qgrra1duRIP_eUYf4Rm7SqMvRYzaMdqQg9KLQDH-8pN6yZU/s640/16.jpg)
More CLOUD!!
Look nicer?
![](https://blogger.googleusercontent.com/img/b/R29vZ2xl/AVvXsEjvc94Yrbs3RlO9ajYZbLYBfR3MUCtzqbZKpihitdc_Y5LYRNqSaujGjfQLcYMdloq29awwysM_MFnIjZwoNakj0uhUOH6z8M8Oz0oc2gsn3imQACxUsWmkJ3wTalXOQF1oj14gQHDRmSE/s640/18.jpg)
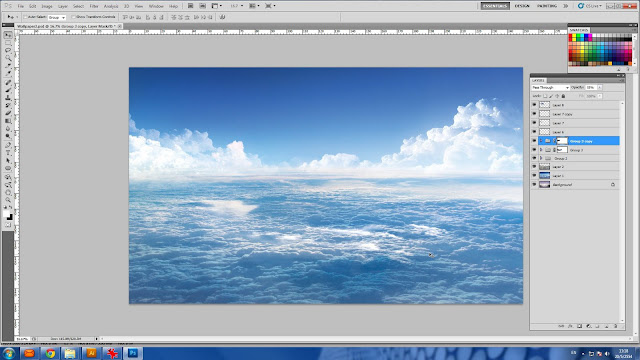
Perfect!!...Now I have my sky wallpaper.
![](https://blogger.googleusercontent.com/img/b/R29vZ2xl/AVvXsEjb4TI1iewD_Zsse2rO3v61TWkHCrpQUxL6VF73w4SPmCKWswcwrRvPtkSinFWtBXCTfvJCS9z4BziEYvd-t1suoEwuA5yJnfFzZ8HZDkKkcOFn7wwKnj2qpErPdS2h4QG5fmFyQSEZHbQ/s640/19.jpg)
Categories:
Phoshop,
retouch,
sky wallpaper,
tutorials
Post a Comment