Nice Background Tutorial
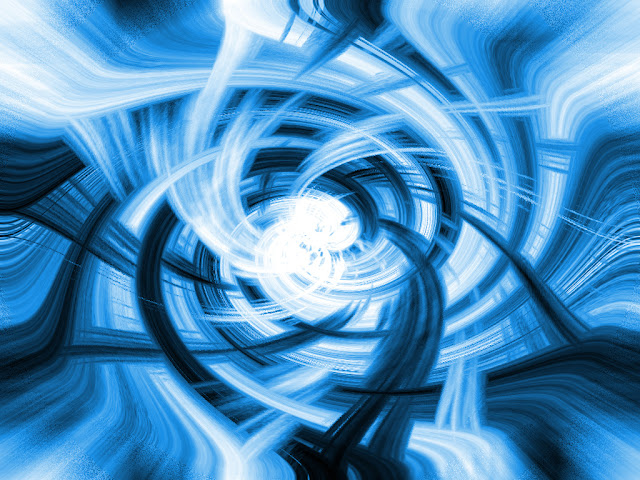
I would like to share you the tip how to create nice background like below example in Photoshop. Have you seen thus graphic before? normally in IT business like to use this style graphic to be like a template or to be part in any media marketing.

Step 1
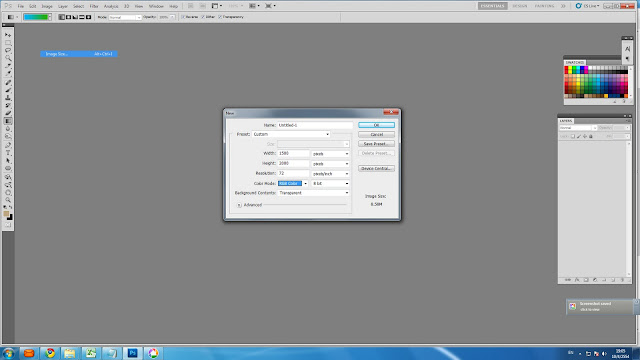
First, create your new document. Press "Ctrl+N" to call "New". Specify Width+Height value as show in the picture. I use width = 2000 pixels, height = 1500 pixels, Resolution = 72 pixels/inch, use color mode in RGB and your Background Contents is White.
Step 2
Now you have your new canvas with white background.

Step 3
Download this graphic into your computer. Locate where you have saved this file, then just drag the file to be opened into Photoshop, just drag it into Photoshop, or you can open this file manually by go to File----->open your file from where you saved.
Step 4
Go to main menu, select Window-->arrange-->Tile, to show all your workshop canvas.

Step 5
Go to select the "Pick tool" at the top of the "Tool box" as you see in the capture. Use the pick tool to click on the twirling graphic on the right, then drag it to place on your blank canvas on the left, to place down the image on to the left canvas, just release your left click button.


We now don't want to use the right twirling background that you downloaded anymore. Stay on the left canvas, then press "F" to maximize this canvas to be fit on your screen.

Go to main menu, select Filter-->Blur-->Gaussian Blur. It will call "Gaussian Blur". Type value to 180 px, then press OK.

You can see the "Layer box" on the right of your screen, if the box is not there, just press F7 to call the "Layer Box".
You will see that there are 2 layers : one is the blur layer that you made, another one is the blank canvas names "Background" as the bottom layer. Now we will duplicate the blur layer by just go to main menu, click Layer----->Duplicate Layer or just hold your left click on the blur layer, which is on the Layer box, then just drag on to the paper icon (create new layer), which next with the Trash icon, then release your mouse.

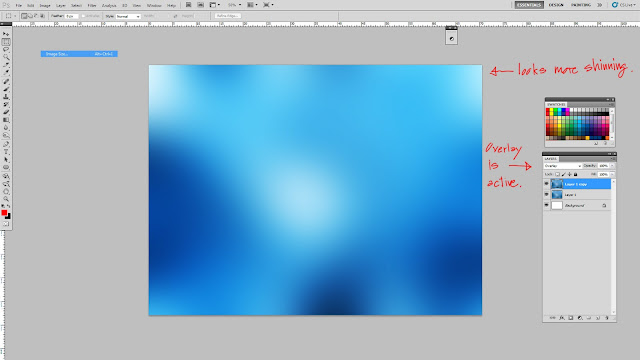
On the layer names "layer 1 copy" on the Layer box, go to click drop-down menu, which is under the box name "Layer", go to select "Overlay". Now your graphic looks more contrast nicely.

Press "L" to change from "Pick tool" to "Lasso", this tool for helping you in making selecting area. Use your lasso tool to make the the dash area like the picture by just drag it one time to make shape, after you dragged or drew it, you will see the selecting area is happened, then right click and select "Feather". it will comes up with "Feather Selection".


Then go to main menu, select Layer-->New Adjustment Layer-->Color Balance. Select OK at the New Layer box. Now you see the adjustment box of "Color Balance". Adjust follow my example. Now you can see in the area that you made selection, the color was a bit changed.


 Here is the highlight. At the layer box, click on the small icon looks like a paper icon at the bottom right aside with trash symbol. Now you have new layer.
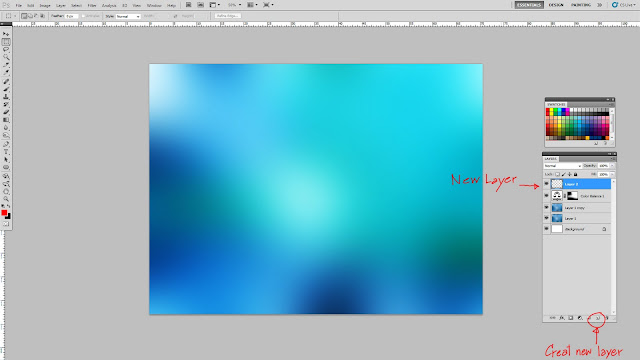
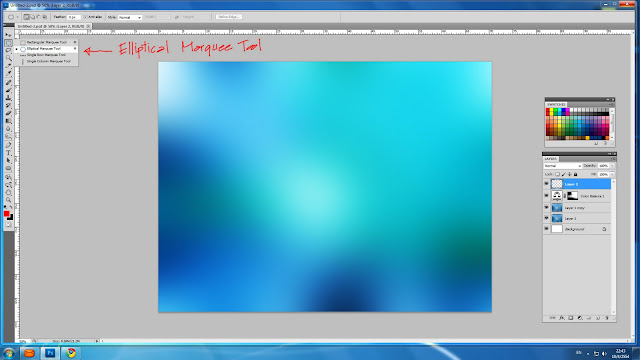
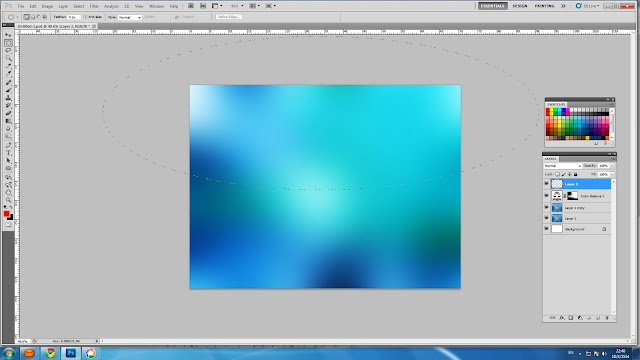
Use "Marquee tool" at tool box, it is below the Pick tool. Hold left click on the marquee tool icon, it will be pop up more options, then select Elliptical Marquee Tool. Go back to your canvas, Drag elliptical shape like example.
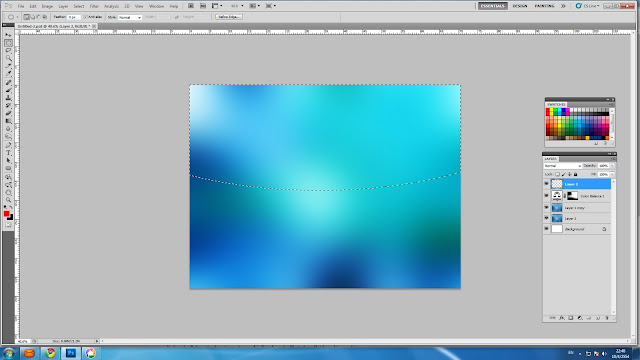

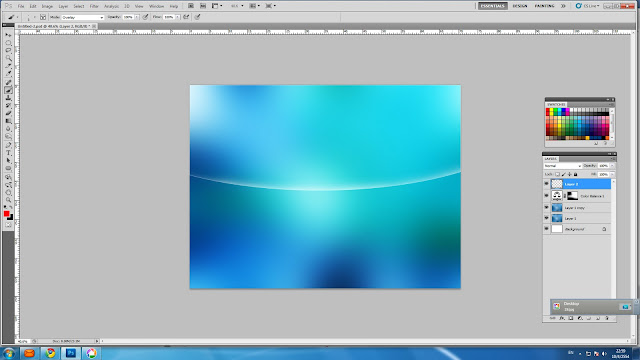
Right click, select "Stroke", this is "Stroke Box". Make sure your width is 1 px, color is white then click OK. Now you made white line that has been drawn along the dash line.

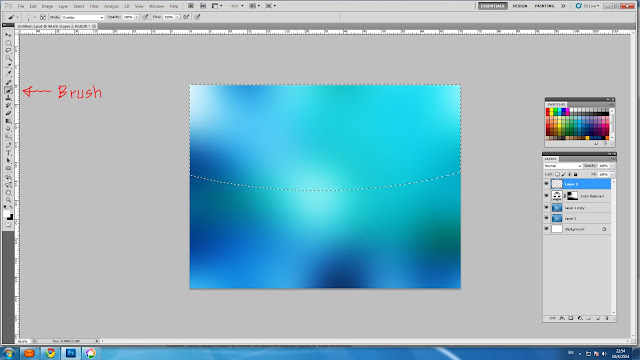
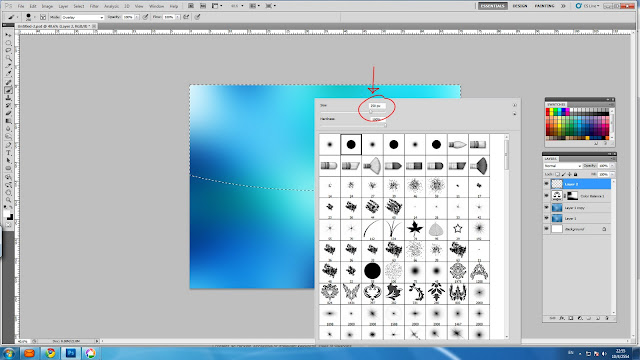
Press B or select the Brush Tool at your tool box, change color to be white by clicking at above left rectangle at the bottom of tool box. It will be shown you the "Color Picker", Choose white color then click OK. Right click, then scroll brush size to 250 pixels and click OK
Brush like example, just hold left click and drag along from left to right. Now you have something looks interesting. Go back to your Layer box, select overlay effect like you have done before. The effect will be soften and look nicer.


Now you may try to add more new one of this effect to be intersect the present one. Go to Layer at main menu, select Layer-->Duplicate Layer then click OK. Use Ctrl+T to call transform box. Rotate the effect and compose position until it looks intersect the previous one as the example.


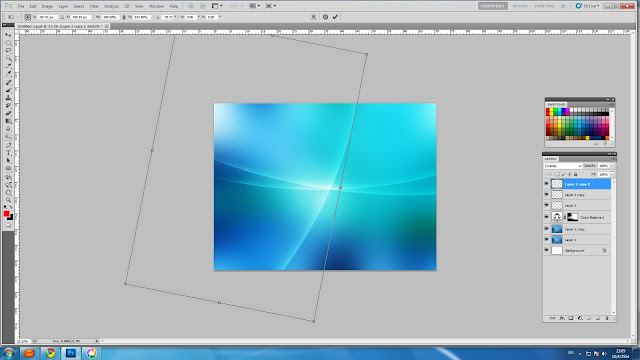
You can create more intersect to make it looks interesting, but don't be too much.
Congratulation!!, now you have some nice graphic created by your own, you may put some text.
Step 4
Go to main menu, select Window-->arrange-->Tile, to show all your workshop canvas.

Step 5
Go to select the "Pick tool" at the top of the "Tool box" as you see in the capture. Use the pick tool to click on the twirling graphic on the right, then drag it to place on your blank canvas on the left, to place down the image on to the left canvas, just release your left click button.


We now don't want to use the right twirling background that you downloaded anymore. Stay on the left canvas, then press "F" to maximize this canvas to be fit on your screen.
Use "Ctrl+T" to transform the image, adjust until the size is equal to your canvas, then click OK.

Go to main menu, select Filter-->Blur-->Gaussian Blur. It will call "Gaussian Blur". Type value to 180 px, then press OK.

You can see the "Layer box" on the right of your screen, if the box is not there, just press F7 to call the "Layer Box".
You will see that there are 2 layers : one is the blur layer that you made, another one is the blank canvas names "Background" as the bottom layer. Now we will duplicate the blur layer by just go to main menu, click Layer----->Duplicate Layer or just hold your left click on the blur layer, which is on the Layer box, then just drag on to the paper icon (create new layer), which next with the Trash icon, then release your mouse.

On the layer names "layer 1 copy" on the Layer box, go to click drop-down menu, which is under the box name "Layer", go to select "Overlay". Now your graphic looks more contrast nicely.

Press "L" to change from "Pick tool" to "Lasso", this tool for helping you in making selecting area. Use your lasso tool to make the the dash area like the picture by just drag it one time to make shape, after you dragged or drew it, you will see the selecting area is happened, then right click and select "Feather". it will comes up with "Feather Selection".

Put in the value to 130 pixels

Then go to main menu, select Layer-->New Adjustment Layer-->Color Balance. Select OK at the New Layer box. Now you see the adjustment box of "Color Balance". Adjust follow my example. Now you can see in the area that you made selection, the color was a bit changed.


Use "Marquee tool" at tool box, it is below the Pick tool. Hold left click on the marquee tool icon, it will be pop up more options, then select Elliptical Marquee Tool. Go back to your canvas, Drag elliptical shape like example.


Right click, select "Stroke", this is "Stroke Box". Make sure your width is 1 px, color is white then click OK. Now you made white line that has been drawn along the dash line.

Brush like example, just hold left click and drag along from left to right. Now you have something looks interesting. Go back to your Layer box, select overlay effect like you have done before. The effect will be soften and look nicer.

Now you may try to add more new one of this effect to be intersect the present one. Go to Layer at main menu, select Layer-->Duplicate Layer then click OK. Use Ctrl+T to call transform box. Rotate the effect and compose position until it looks intersect the previous one as the example.
You can create more intersect to make it looks interesting, but don't be too much.
Congratulation!!, now you have some nice graphic created by your own, you may put some text.

Oh man!!..It is very difficult to edit and compose the picture in Blogger..
Categories:
graphic design,
nice graphic tutorial,
photoshop,
Template,
wallpaper
Post a Comment